Pre-paid cards works like Sodexo or Multinet cards. The difference is you give these cards to your customers and you sell credits. Once funds added to a card the customer can spend it on your restaurant. Some businesses prefers that because instead of paying comission to card companies they want to make discounts to their customers.
SambaCard is just a fictional name. You can name it as you like.
Configuration
Hint: Before starting you can read a brief introduction of V3 Accounting Features.
SambaCard Account Type:
We'll create a new Account Type called "SambaCard Accounts" by navigating to Management > Accounts > Account Types
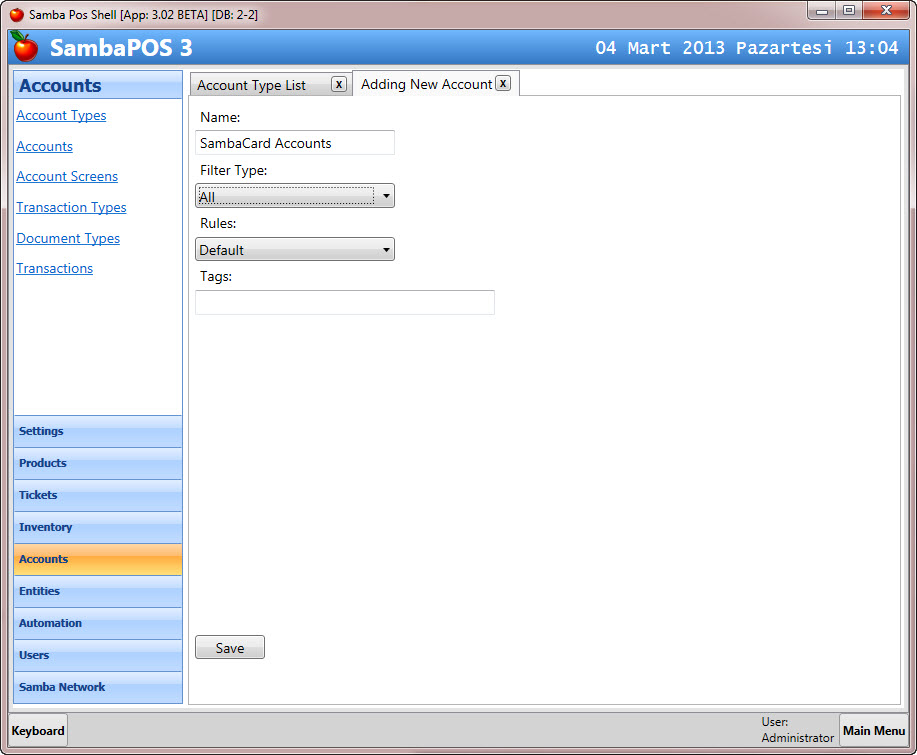
A new SambaCard account is created for every card we give to our customers.
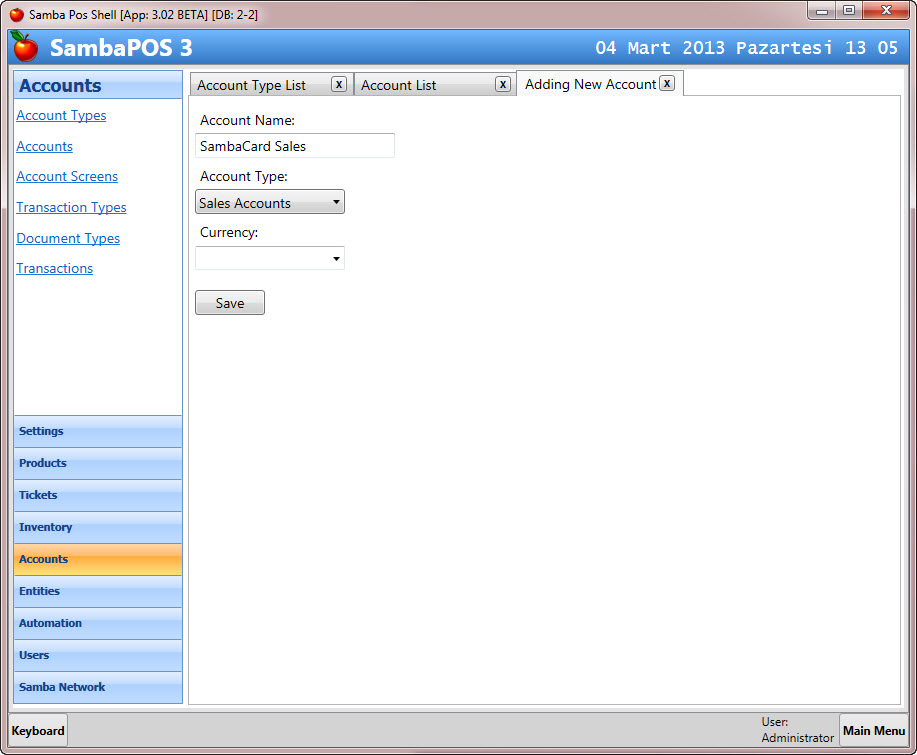
We need an account to track SambaCard Sales. We'll create a new Sales Account to differ them from normal Sales.
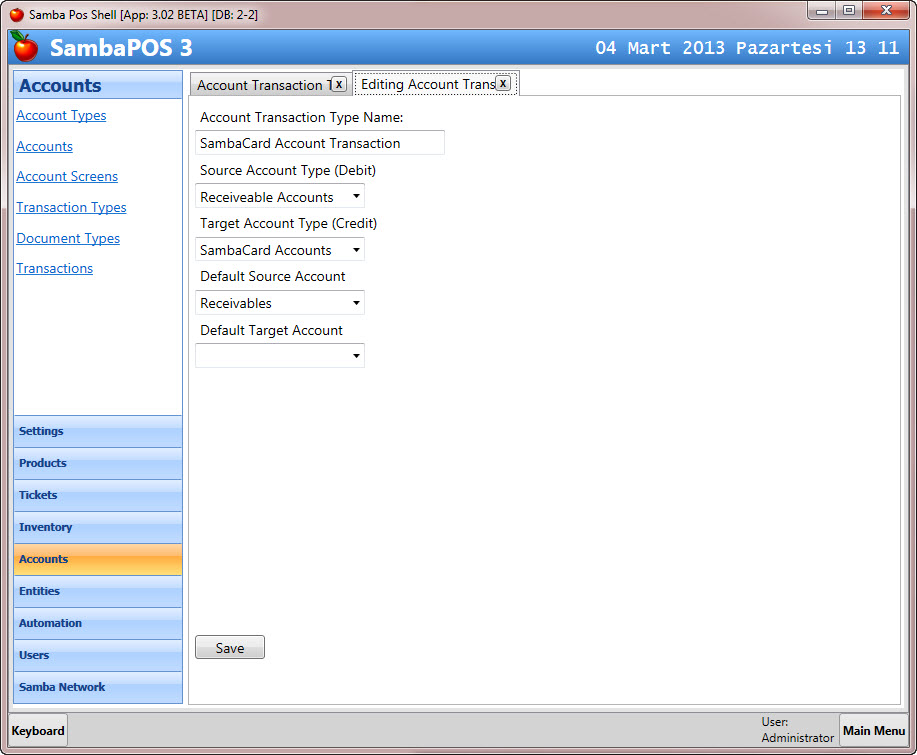
We'll create a new Account Transaction Type to be able to Add Funds to Customer Cards. We can create it by navigating to Accounts > Transaction Types.
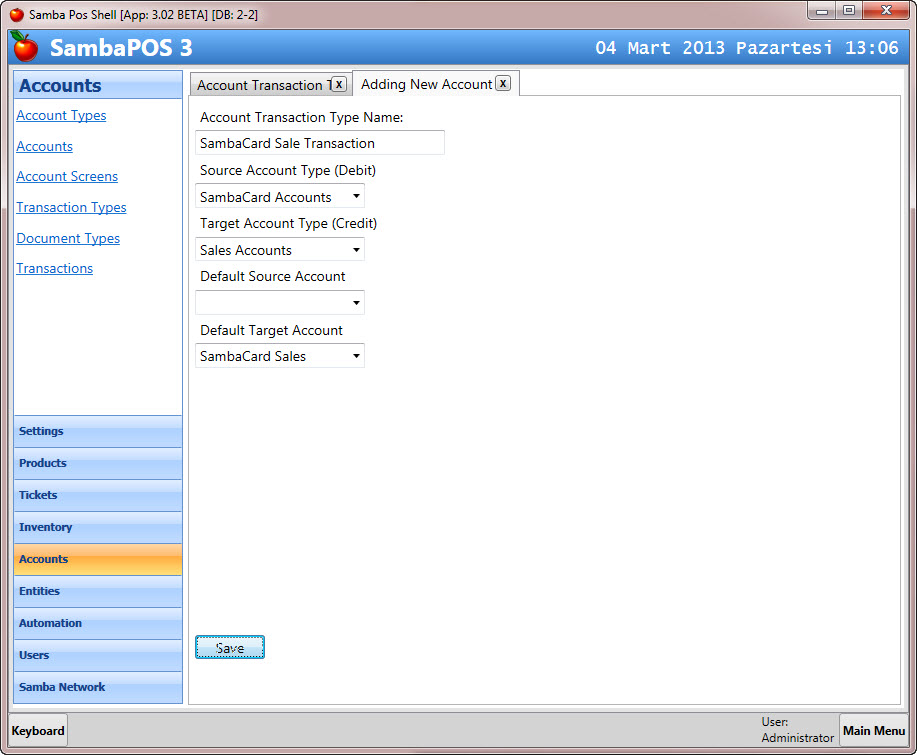
We'll configure here how "SambaCard Sales Account" and related "SambaCard Account" works when we add funds to a card. This configuration means when we Add Fund to a customer card, it credits SambaCard Sales account and debits "the SambaCard Account.
We'll need a "Add Funds" button on Card accounts to add funds to cards easily. We'll do that by configuring a "Transaction Document Type"
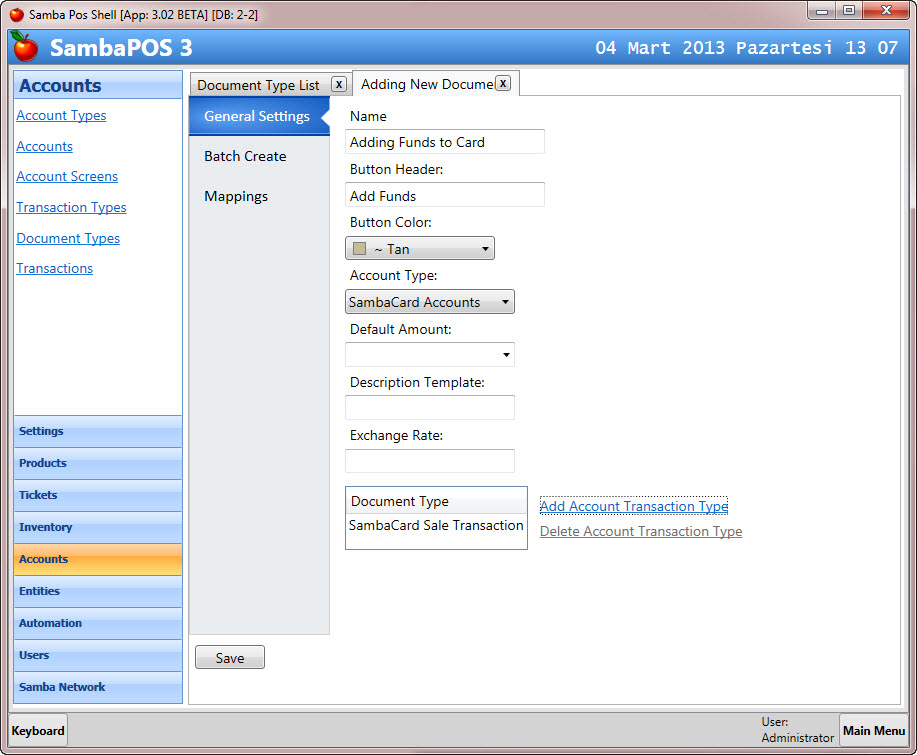
This configuration will create a green button labelled as "Add Funds" at Account Transaction Screens. We'll use it to add funds to SambaCards so to be able to display that button for SambaCard accounts we selected "Account Type" as "SambaCard Accounts". Since it will create a SambaCard Sale Transaction we add it to the transaction list by clicking to "Add Account Transaction Type" link.
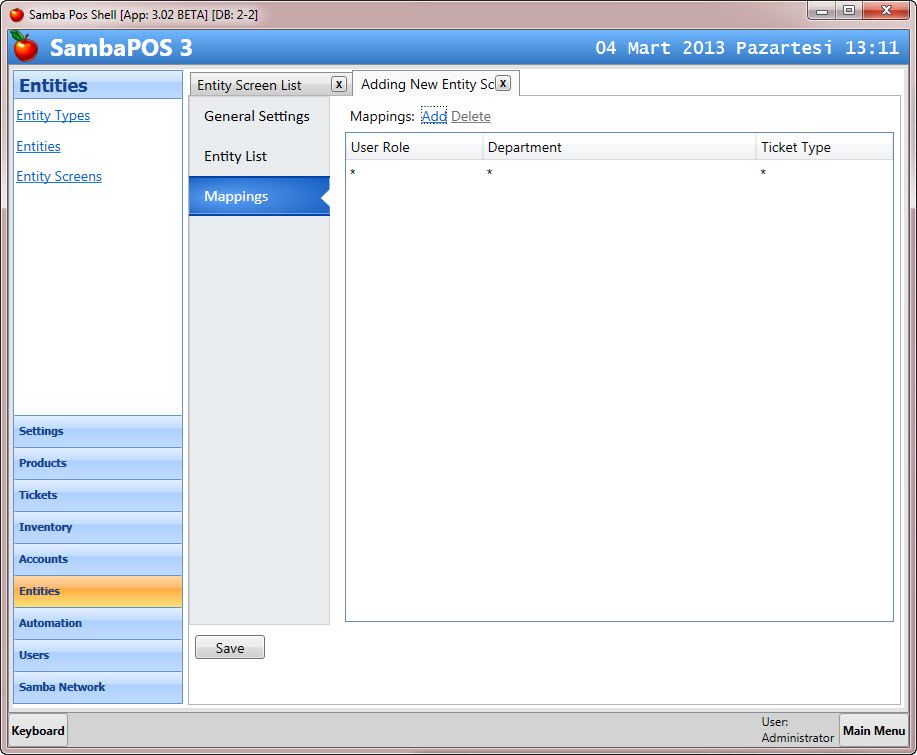
Now we'll configure how that button will display. So we switch to "Mappings" screen.
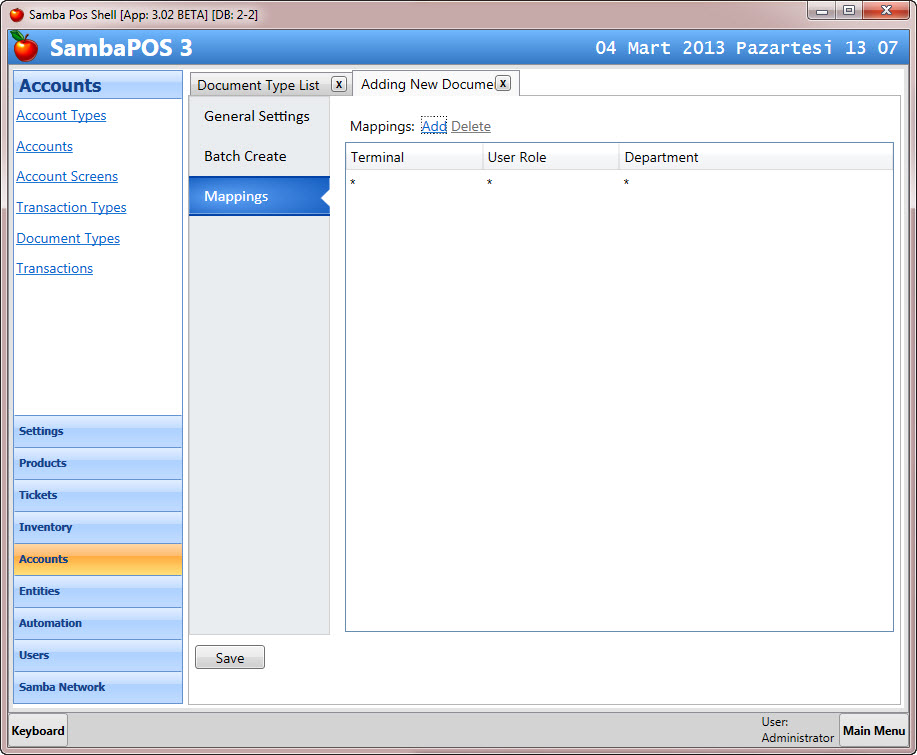
We'll configure here on which user accounts, departments or terminals that button will appear. * means "ALL" so we'll leave everything as * to make it work for everyone. That's all we need to do for Adding Funds to Customer Cards.
Entity Configuration
On this step we'll introduce a new Entity Type so SambaPOS will know we have something called "SambaCard" in our Restaurant and we need to select it on tickets like we select Tables, Customers or other similar entities.
We do it by creating a new Entity Type. Navigate to Entities > Entity Types for creating a new Entity Type
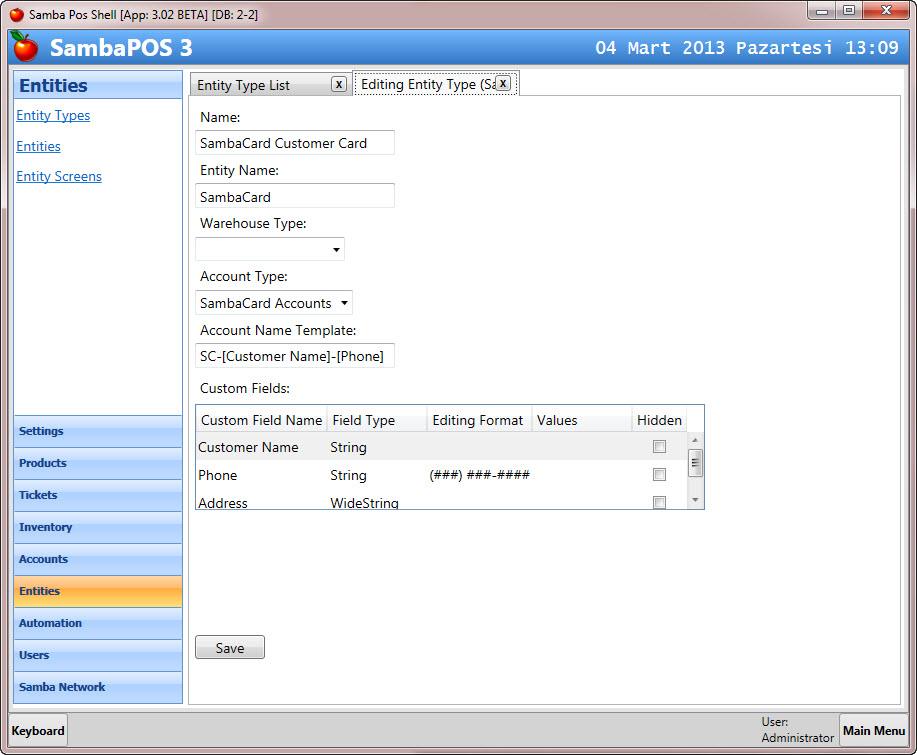
- Name: A descriptive name of the entity.
- Entity Name: The singular name of the Entity. It is "SambaCard"
- Warehouse Type: We'll leave it empty since this entity is not related with Warehouses.
- Account Type: The Account Type of these Entities. We'll choose "SambaCard Accounts" here.
- Account Name Template: When we create a new entity we'll also create an account linked to this Entity. For example for your "Customers" you can open an account or not. If they have an account they can make payments later. What we configure here is how we need to configure linked account names. Since we create them automatically SambaPOS needs to know it. SK-[Customer Name]-[Phone] means for the Customer Emre EREN with Phone number 111222333, the account name will be SK-Emre Eren-111222333
- Custom Fields: We'll configure additional data fields we need. Do it as it appears on the screen shot. You can create new fields from "right-click menu"
That configuration means when we create a new SambaCard it will ask us the "Customer Name", "Phone" and the "Address". It will also automatically create a new SambaCard account and link it with new SambaCard.
Now we need a POS Screen to "search, add, edit" cards. We can do it by creating a new "Entity Screen"
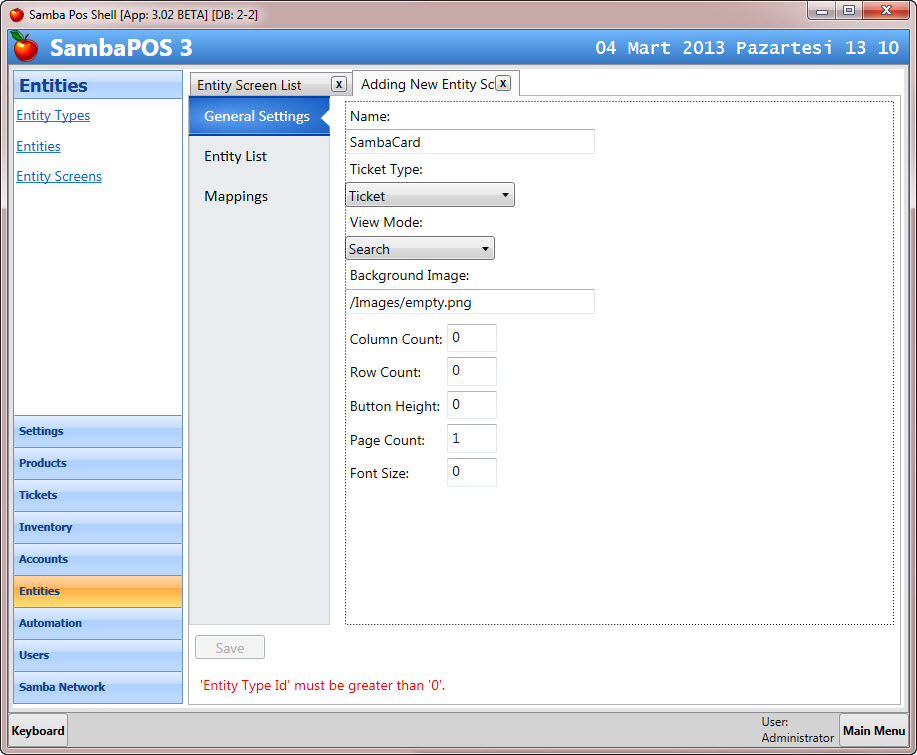
The screen name is also "SambaCard" and it will display as a POS button on top of the screen. Ticket Type will be Ticket and the ViewMode should be "Search" . We'll switch to Entity List screen.
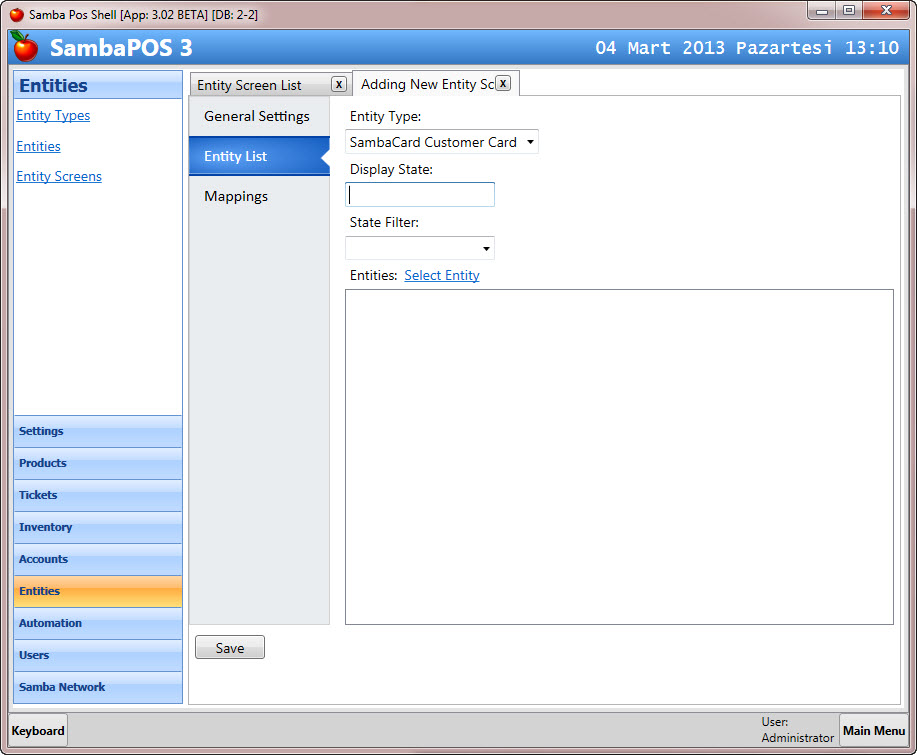
On this page we'll configure which Entity Types we'll use on this screen. Obviously it should be "SambaCard Entity Type". We also need to configure how that screen displays to users.
If we have multiple departments we may want to disble "SambaCard Selection Screen" for specific departments. For example we may want to disable it for Delivery department. I'll use default settings by adding a new mapping and leaving all values as *.
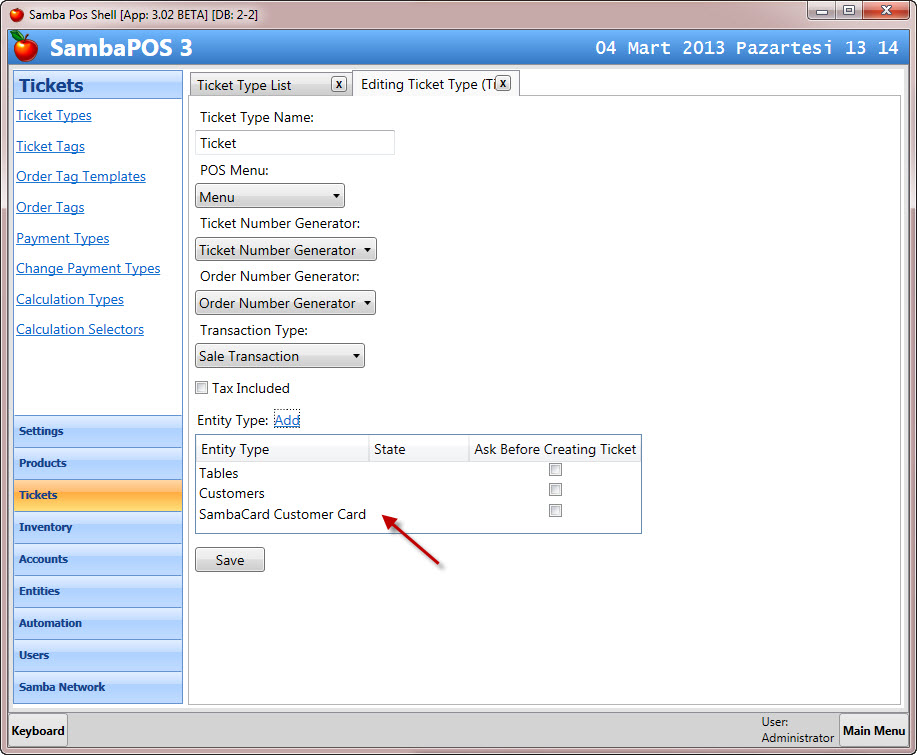
To be able to use this entity on Tickets we need to assign this Entity Type to the Ticket Type we'll use. You can configure the default Ticket Type from Management > Tickets > Ticket Types menu.
Payment Type Configuration
Since we'll use SambaCard as a payment type we need to create a new custom Payment Type for it. But before creating a new payment type we need to define how this payment works. For example Cash Payment moves amount "Receivables Account" to "Cash Account". Likewise a SambaCard Payment transaction moves amount from "Receivables" to "SambaCard Accounts". We can configure it by defining a new Account Transaction Type.
It looks like the SambaCard Sale Transaction but it does the reverse transaction.
Now we cen create the Custom Payment Type.
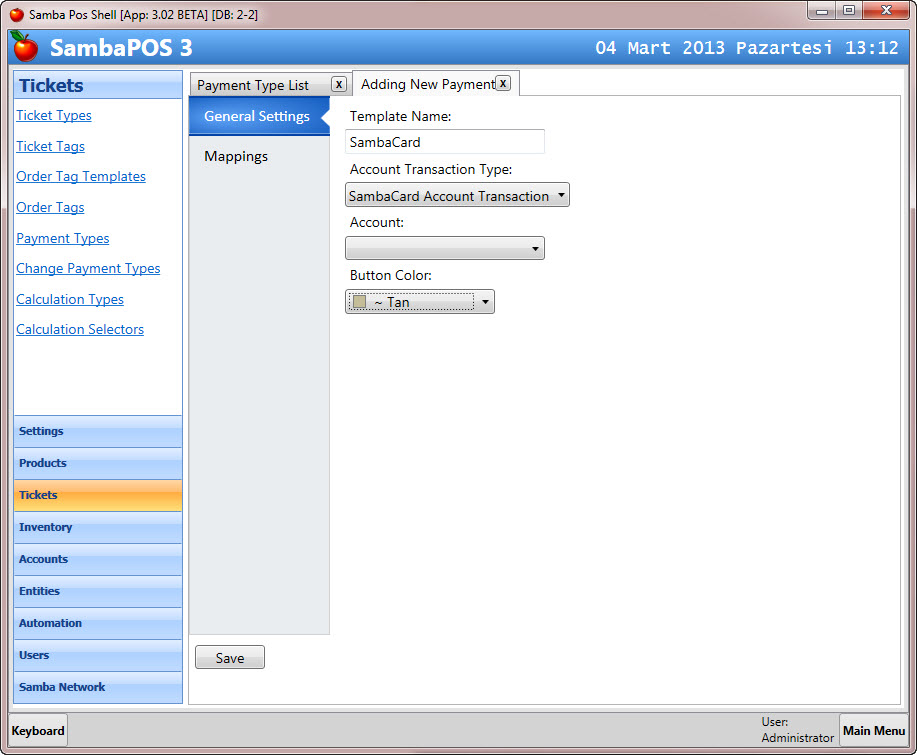
I named it as SambaCard and assingned "SambaCard Account Transaction" to it.
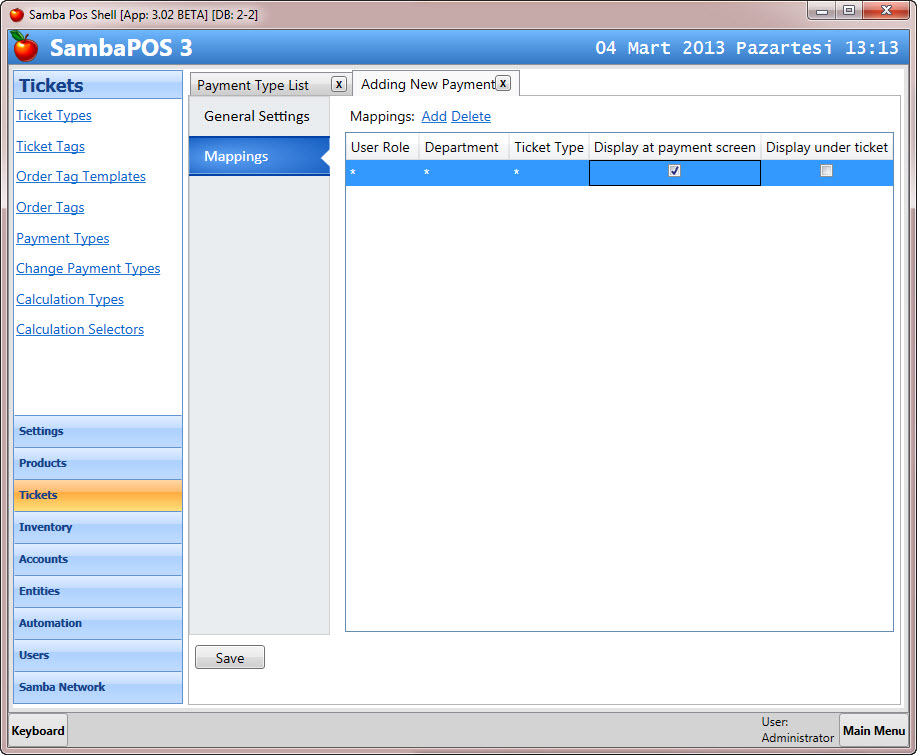
Mapping screen works likes the others but this time we also choose where it displays. We can show that payment button on payment screen, under ticket or both.
That is all we need to do for the configuration. Let's see how it works.
Demonstration
We have an additional "SambaCard" button on POS screen. This works like the Customer Search screen. We'll use unique card numbers as the card names. We can search for a card number by typing it or by using a keyboard emulated magnetic card reader.

There is no 55716911 Card so no results shown. We can create this card by clicking "New SambaCard" button.
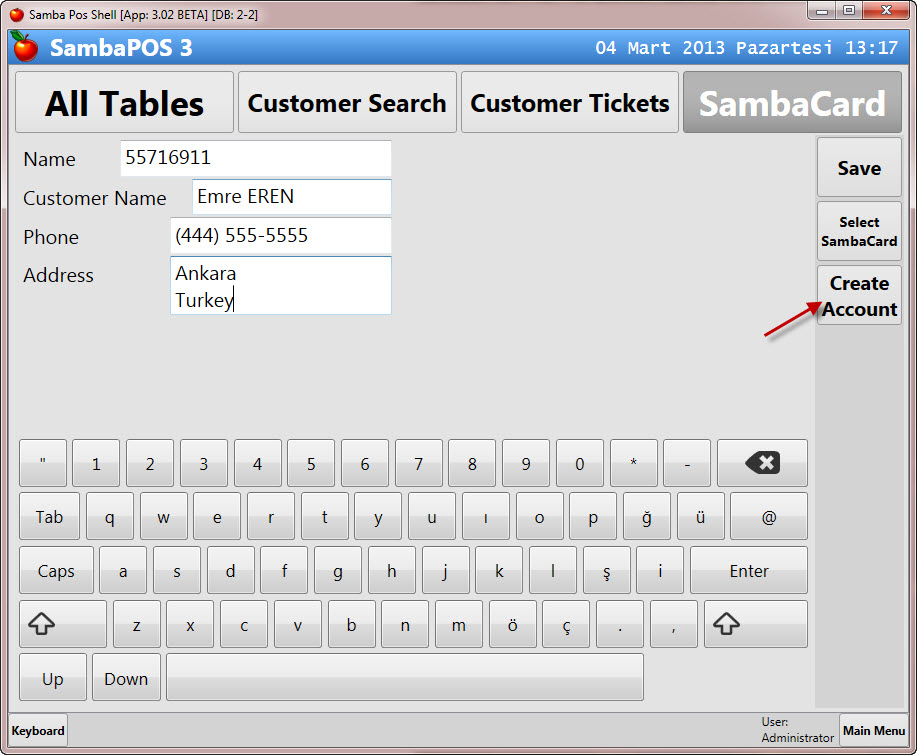
And we enter the card details. Notice how address field permits multiple lines because it configured as Wide String Field. Clicking Create Account button will create SambaCard, Create linked account and assign it to SambaCard.
After creating a SambaCard we return to search screen to complete further actions.
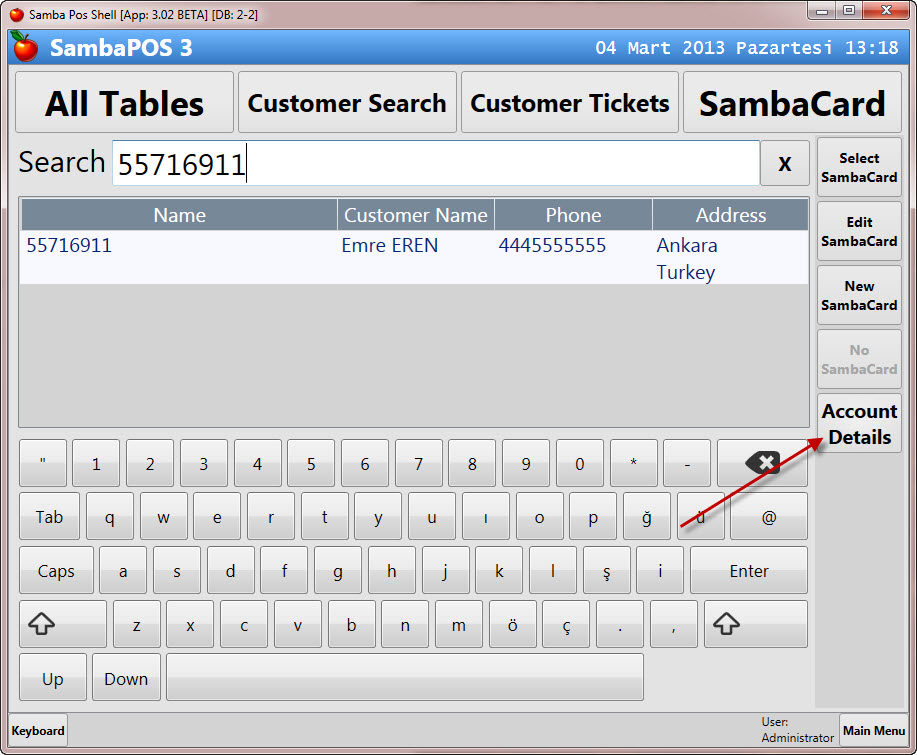
- Select SambaCard: Creates a new ticket or displays if there is an open ticket linked to that card.
- Edit SambaCard: You can change details or create linked account if not created before.
- New SambaCard: Creates a new SambaCard.
- No SambaCard: When enabled it unlinks card from ticket.
- Account Details: Displays Card Transactions.
Click "Account Details" to display Account Functions
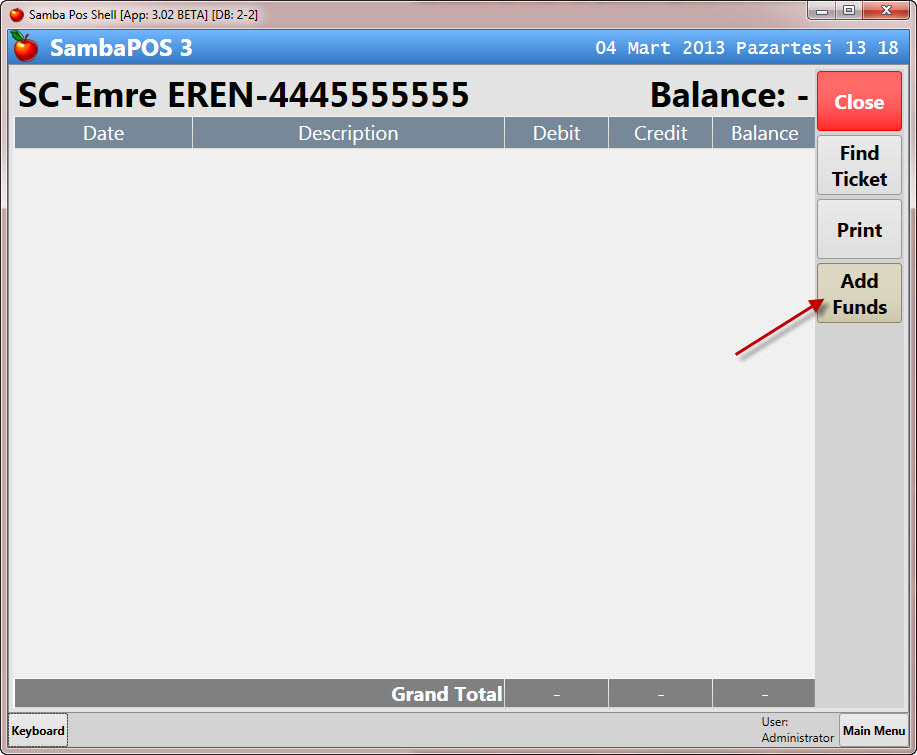
We should see the "Add Funds" button that we configured to add credits to SambaCard. Click it to add funds.
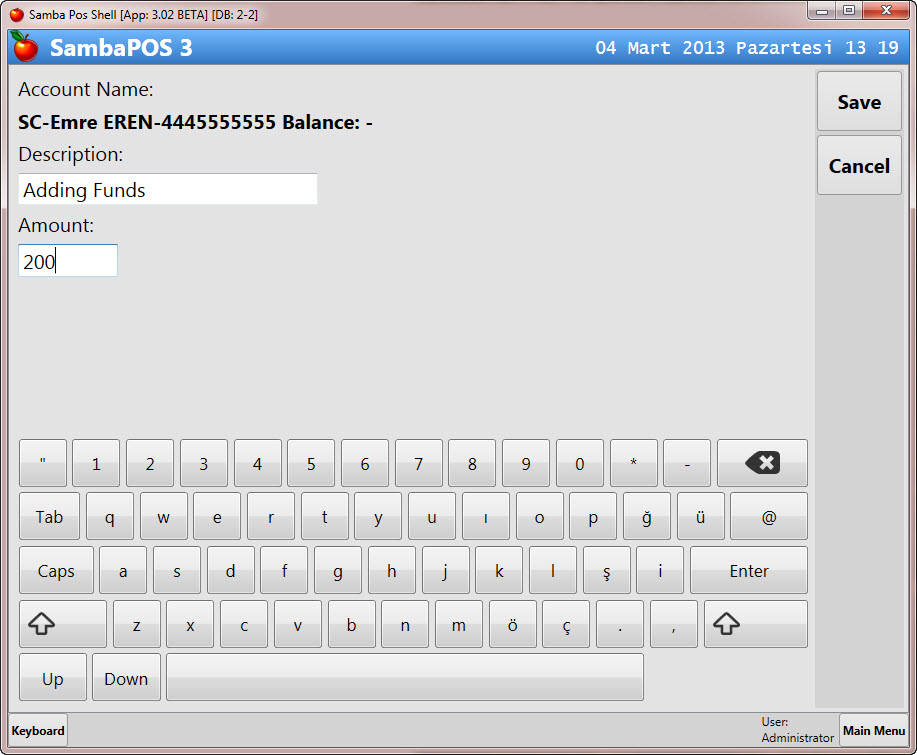
We added $200 Credits to the Card Account. Notice how account name genated from Card Data we entered.
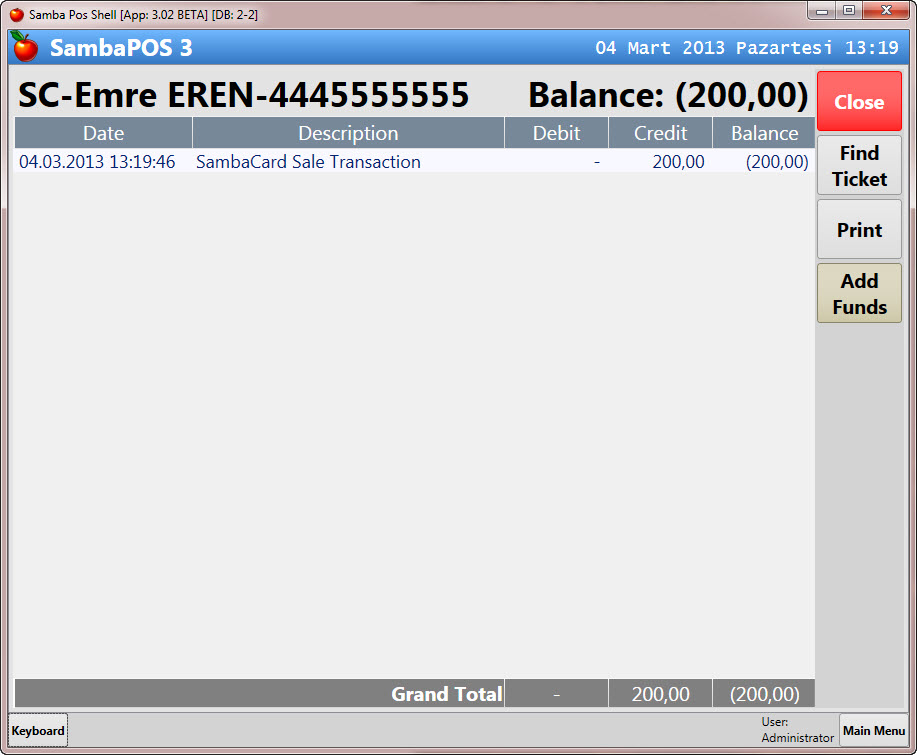
When saved it displays our transaction.
Now we can create a ticket and assign SambaCard to it.
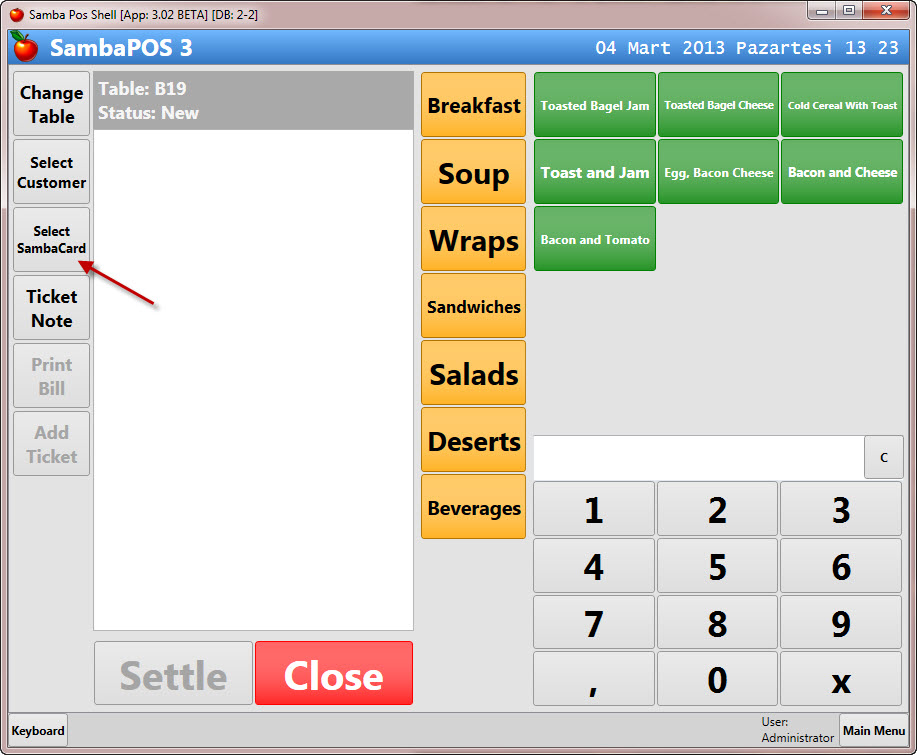
Click "Select SambaCard" button to display SambaCard Search screen.
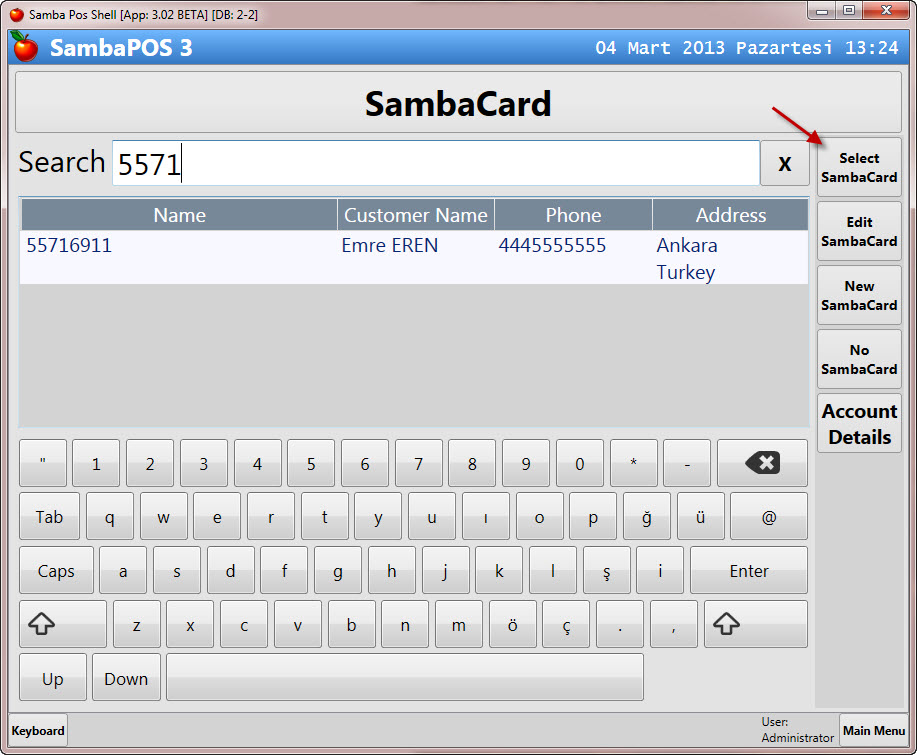
Type card number and click "Select SambaCard" (or press enter key)
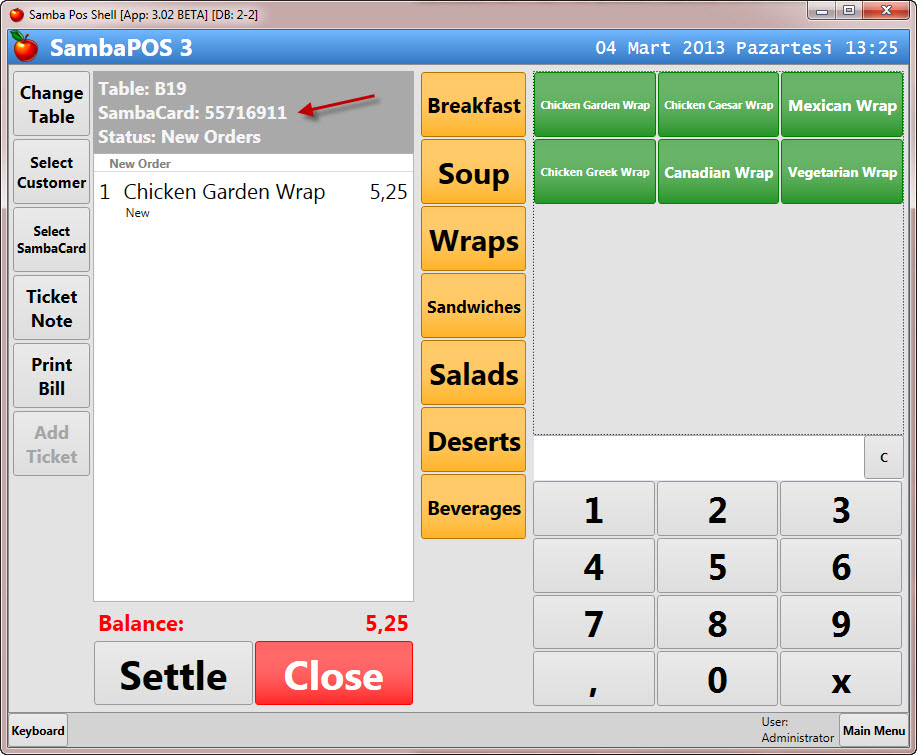
Card assigned to the ticket. Add some orders and click "Settle"
SambaPOS switched to Payment Screen. You should see the SambaCard balance next to account name. Also we have the "SambaCard" payment button.
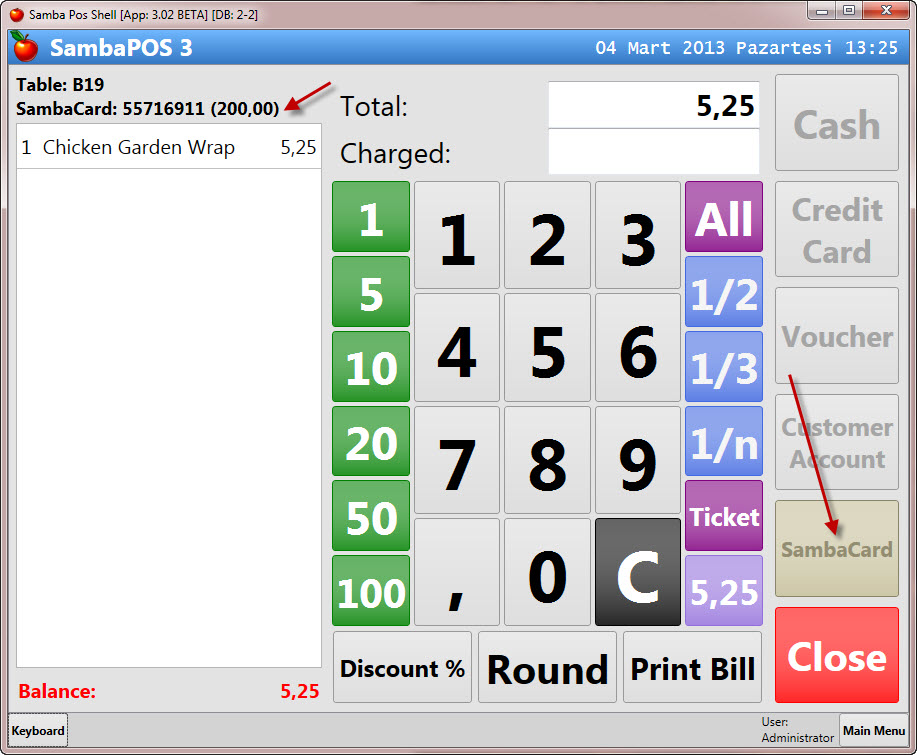
Click "All" and settle the ticket with "SambaCard" payment. It should close ticket with "SambaCard" payment.
Check the End of Day report to see if it recorded fine or not.
You can also check Card Account to display or print past transactions.


